A keychain made from resin is an ideal present! Find out how to create DIY keychains made of resin with various designs by following these easy instructions.
Skills Required: Advanced Beginner. I suggest having previous experience in resin because there will be a lot of mixing and glitter. However, a keychain can be an excellent place to begin as it’s only a small size.
I’ve created a lot of keychains throughout my career. If you’re an artist, then it’s inevitable. Perhaps a keychain was the first item you’ve ever created? When I was in the church at age eight, I made the cross with leather that my mother, I think, wears today. It was hers for a long time.
One of the most appealing aspects of making a keychain is that it’s great for those who are just starting and making excellent gifts. Actually, I’m going to take your DIY gifts up a level! I’m about to teach you how you can make DIY keychains made of resin!
If you’re thinking of how to make resin, it’s easy; however, you need to be sure to) put on protective equipment in case you’re concerned regarding any irritation to your respiratory system and) be sure to follow mixing guidelines with care.
DIY resin keychains
Making use of resin is a fantastic way to showcase your creative side! It’s a versatile material and can be used for many various tasks. After sharing how-to tutorials on the creation of jewelry, dice ornaments, rings, and other items, We’re now learning how to make keychains made of resin!
The best aspect? All you require is epoxy resin, color embedded in it, colors, and a couple of simple tools. From choosing the right resin to stunning silicone molds and creative ideas for designing your own keychains with resin, The article has everything you require to design gorgeous letter-shaped keychains made of resin.
Suppose you want to grow the scope of your hobbies or increase your resin-related business. In that case, I’m sure you’ll enjoy my tutorial for making resin keys beneficial, and you’ll be motivated to make your keychains made of epoxy!
Our good friends from IntoResin sponsored this article. Our opinions are entirely mine, and I only post items I enjoy. We appreciate your support of the companies that make this website possible.
The ideal resin for keychains
Resin is a chemical compound comprised of two parts: resin and hardener. Both are liquids. However, they become solid when mixed.
Many kinds of resin are offered, such as epoxy resin and UV resin. In this tutorial on resin-rich keychains, I highly suggest the Quick Cure Casting Resin by IntoResin.
I’ve been making using this resin for nearly an entire year and utilized it for a variety of tasks. It is quick to cure, appears crystal clear, and is ideal for casting tiny pieces. This is what I like about this item:
- Cure time: Fast Cure Casting Resin cures extremely quickly. Small pieces cure in some hours, and more substantial pieces will be hardened within 24 hours.
- The clarity of IntoResin’s epoxy is the clearest resin you can discover. It’s like glass and isn’t discolored.
- Surface: It sets to be hard and shiny on the surface. It is not necessary to sand or polish!
- Bubbles: If the combination of hardener and resin slowly and carefully, you can prevent bubbles. You can see from the images they came out nearly without bubbles.
- Fumes: I love that it’s not strong-smelling, as I’ve not had headaches.
How to Make DIY Resin Keychains
Materials
- Epoxy Resin / UV Resin
- Silicone Molds
- Glitter, alcohol inks, flowers, etc
- measuring cup for measuring ( I prefer plastic measuring cups)
Tools
- Heat Gun
- Cricut for adding vinyl decals
- Hardware for Keychains and Jewelry, eye screw
- Popsicle stick
Instructions
Equal amounts should be measured out of the two epoxy mixtures. I took 10ml of each and separated them into two distinct types of key chains.
- Place the mixture in one cup, then slowly stir it for around 3 minutes. Make use of a hot gun to pop bubbles.
- Use alcohol or glitter or both to mix.
- Place the molds in silicone. Use a hot gun to heat the mold for several seconds in order to break up any bubbles.
- Dry overnight.
- Remove dried resin from the molds. Sand, if needed.
- Alternately, apply permanent vinyl cut by a machine for cutting.
- Connect hardware.
- Enjoy your homemade keychains!
Resin keychain design ideas
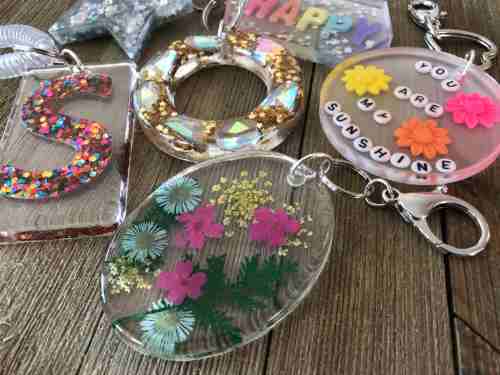
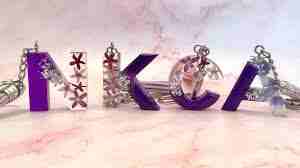
Keychains made of epoxy combine functionality and aesthetics. It is possible to create keychains made of resin characters in almost any shade and include any kind of decoration, including gold leaf, glitter, small pressed flowers, and even ornaments.
When you’ve learned the fundamentals, you can become extremely creative in your keychains of letters made from resin concepts. To inspire you, I’ve designed several styles to show how adaptable resin can be.
Marble
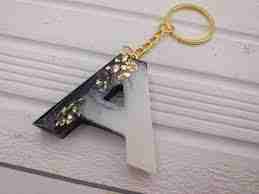
The design on the left is a simple white and black marble effect that gives the letters a classic and refined feel. I decorated the letters with black hardware. However, gold elements could look stunning as well. This is how you can make them:
Mix the resin and add a little bit to an additional cup.
With alcohol ink, you can tint the larger amount of ink white and the lesser amount with black.
Utilizing a wooden spoon to drizzle a little black mixture over the white, then add it to the mold.
creating keys
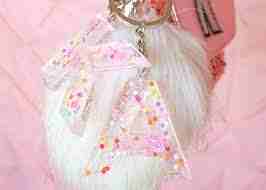
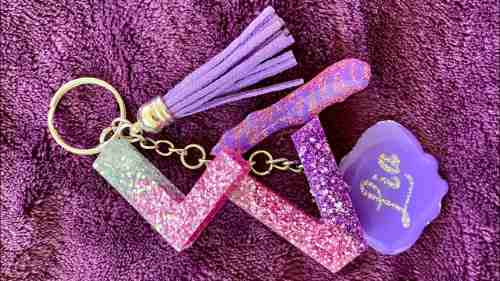
Iridescent Sparkle
These keychains with letters are constructed of stunning iridescent crystals placed inside the transparent crystals. I chose this chunky sparkle that combines sequins, glitter, and hexagonal with a stunning Iridescent look. We’ll get started!
Each mold should be filled half-full with clear resin. Let’s set it for around an hour.
Then, apply an even layer of glitter that covers the entire surface of the ornament.
Then, add another resin layer and fill the mold to its edges.
Instead of mixing the glitter in the resin, you prefer to put it between two clear resin layers. So, no glitter particles can escape from the resin, leaving an extremely smooth and shiny surface. It is also important to avoid over-saturating the resin with glitter, which could cause issues in curing.
Botanical Glam
Gold leaf and dried flowers give botanical keys a classy and feminine edge. I chose to use the dried flowers in pink and rose gold hardware. Below is an overview of how to do it:
The mold should be filled with 2/3 of transparent resin.
With tweezers, place dried flowers and bits of gold leaf into the resin. Using an instrument to push the pieces in your desired location gently is possible. Dry petals can float around in the resin. Dip them in resin before placing them inside the mold to ensure they stay on the same level.
When you’re satisfied with the design, you can complete the mold using transparent resin.
Make sure no stray particles are visible from the resin. If you need to, gently push flowers in the resin using an instrument such as a toothpick.
Sprinkles
They are fun and sweet. Sprinkles of all kinds are suitable for this. Sprinkles like nonpareils (like those you can see in images), Rainbow jimmies the confetti/quins sprinkles and sugar pearls. Take a look through how to do it:
Place a thin layer of transparent resin in the mold to cover it with the bottom.
Sprinkle the sprinkles in the mold until it is about one-quarter full.
Make sure to fill the mold up by filling it with crystal clear. I prefer to mix the resin and sprinkles with the help of a toothpick to remove air pockets. Also, make sure the sprinkles are completely fully covered with resin.
Rainbow Letters
This technique for creating rainbows is straightforward and highly effective. It is possible to go all-in using all colors of the Rainbow or select just 3 to four colors to create a tie-dye result. What you need to accomplish:
- The mold is filled 3/4 full of transparent resin.
- Drop a drop of alcohol-based ink into the resin. Then, follow the shades of the Rainbow (yellow, orange, and purple). Blue as well as turquoise and green).
- Use a light hand and add only up to 2 drops for each color. More than this amount is not going to help.
- Utilize a toothpick to disperse the dye onto the surface, creating colors that change.
- To seal everything to seal it all in, you can finish the keychain with the final coat of clear resin.